

Most of us had a dream car at 18 that we could not afford, could not insure, or could not keep running. oaklandautodetail is doing something about that. “I’m 39 years old and I’m building the car I wish I had when I was 18,” he says, and he has been posting the work as he goes.
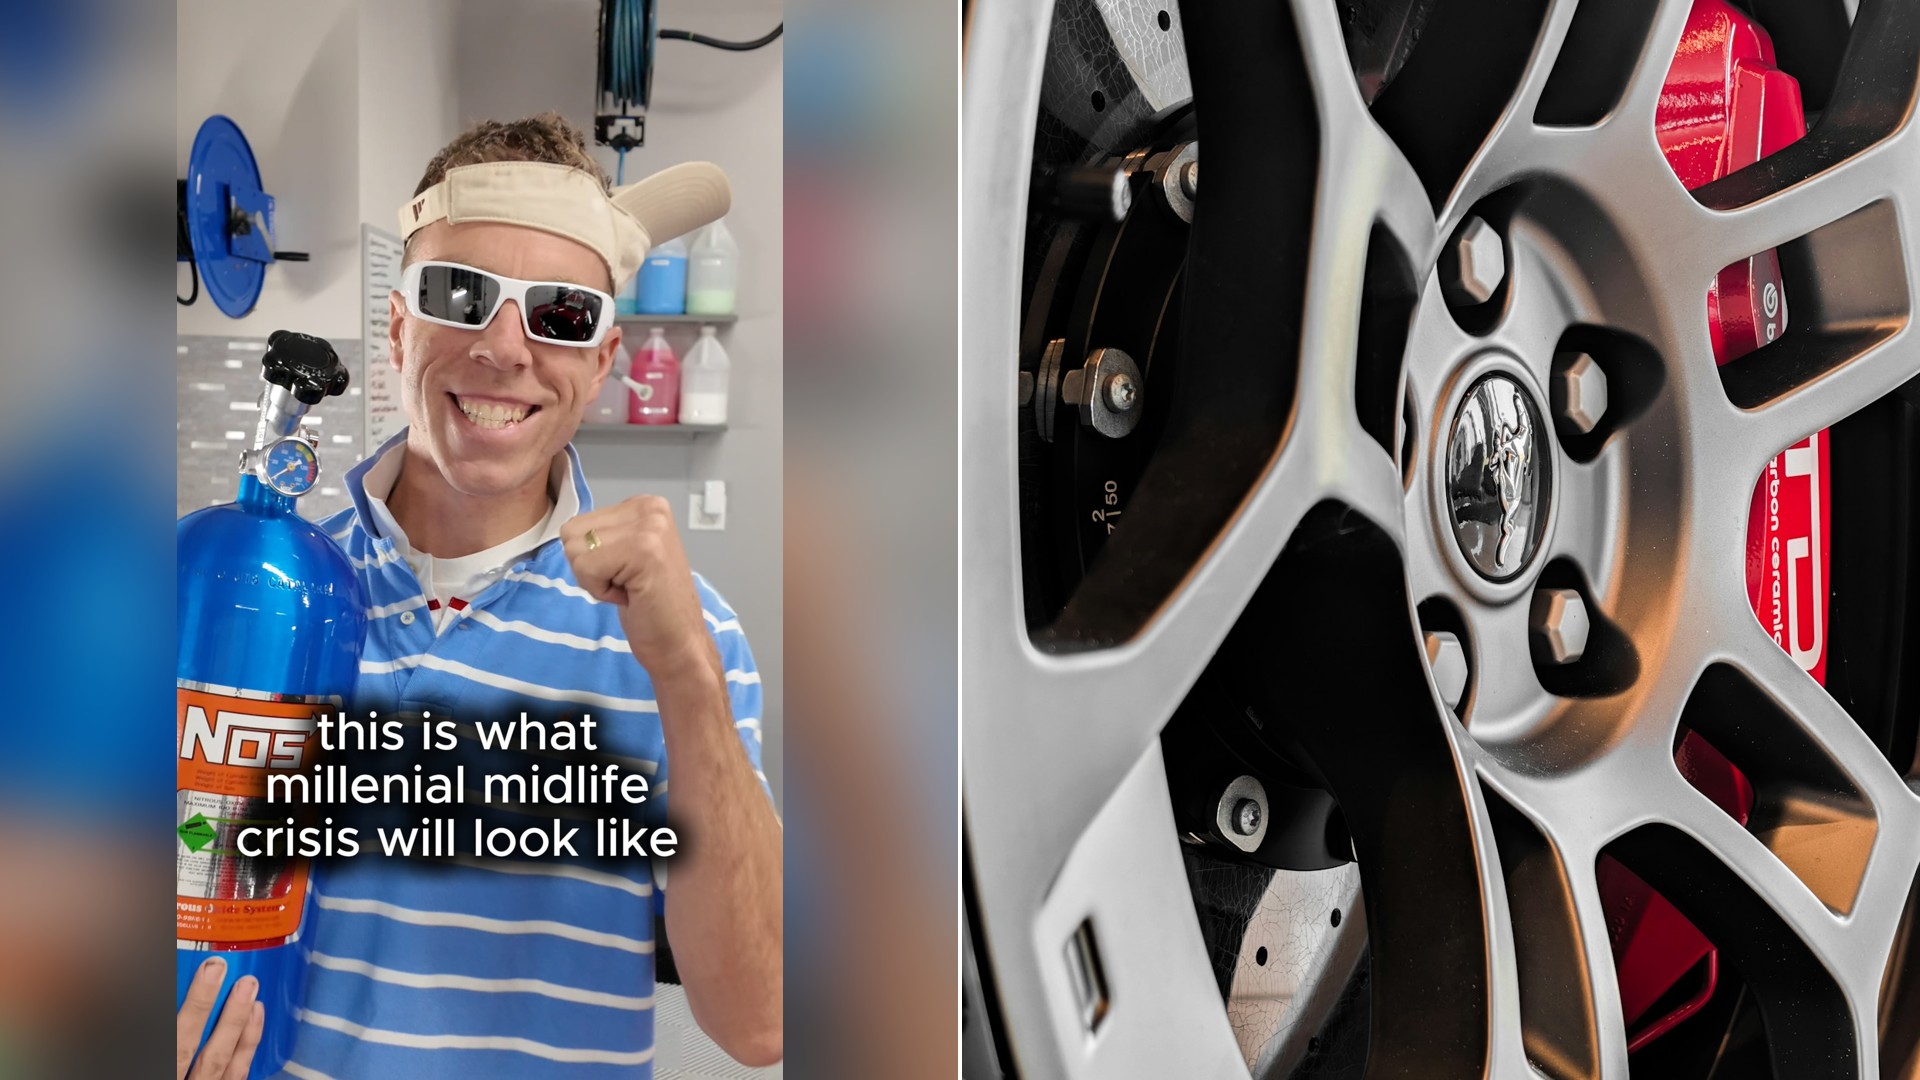
The latest round is not about big horsepower. It is about the small stuff that makes an old car feel loved, and one tiny detail in particular that shows how much he cares.
His car is about 25 years old, a fact that matters later when the repair list starts to grow. He says plenty has already been done, but more parts are waiting to go on.
View this post on Instagram
“There’s No Way I Can Continue With Brakes That Look Like This”
First on the list are the brakes. He says he is installing new parts, but the real goal is painting the calipers red.
The job starts with a 3/8 Allen head socket to loosen the caliper pins. Then he uses a pry bar to work the assembly off the rotor.
With everything removed, he builds what he calls a cardboard box paint booth and sprays the calipers red. It is a budget trick that keeps overspray off everything else, and it gives him a clean place to let the paint dry.
He also remembers how things were when he was 18. Some guys, he says, would not even take the brakes apart before painting them. “They’d just take the wheel off and start spraying everything.” This time he wants to do it right.
The 25 Year Old Warning Sticker That Got Peeled Off And Super Glued On The New Tank
While the paint dries, he moves under the hood. He decides it is a good moment to replace the ugly coolant overflow tank, and he says he loves any chance to swap old, grimy plastic for something that looks new.
Better yet, he found a brand new one. Side by side, the difference is plain.
Then he hits a snag. The new tank did not come with the warning label that the original wore for 25 years.
His fix is the best part of the whole build. He peels the old sticker off the old tank, and thankfully it comes off just fine. There is no adhesive left on it, so he uses super glue to attach it to the new tank. “I always like preserving little details like this,” he says.
That kind of thing separates a parts-swap from a real restoration. Anyone can bolt on shiny plastic, but keeping the factory label is what makes the engine bay look right to people who know these cars.
“I’m A Sucker For Telling Myself, Hey, While This Is Apart, Why Don’t I Fix That?”
With the tank out of the way, he gets easy access to the upper motor mount. He admits he is a sucker for telling himself, hey, while this is apart, why don’t I fix that?
That habit, he warns, can get you in trouble with a 25 year old car, because basically everything needs replacing. Every old-car owner nods along at that line.
He shows a before-and-after of the mount and calls it a nice improvement. It is the kind of repair that is easy to put off and hard to get at later, which is why he does it now.
Colored Wire Loom, Three Sizes, And A Nod To The Tuner Era
Next comes the part that brings the nostalgia. He says no 2000s tuner car was complete without colored wire loom under the hood, because it adds color to boring black hoses.
He bought three different sizes of the plastic tubing. It simply slides over the hoses and hard lines, and he says it is easy enough that anybody can do it.
He also says it was actually fun to do something so simple for a change. After the harder jobs, a quick win like that keeps a long project from feeling like a grind.
Two Street Glow Strobe Lights From 2004 To Make The Engine Bay Look Like Lightning
Then he teases what he calls his next surprise: not one, but two street glow strobe lights from 2004. He plans to mount one on the firewall and one next to the battery.
His idea is that the flashing will look like lightning under the hood. He points the lights downward so they do not blind him when he turns them on, and he mounts the switch within easy reach.
When he flips it, his verdict is simple. “Hey, I love it.”
Before he signs off, he puts the freshly painted red calipers back together and says they look good. The next project on his list is installing racing seats.
What To Take From This Build If You Want To Try It Yourself
You do not need a big budget to get this kind of result. Most of what he does here is cleaning, painting and small swaps that cost far less than a performance part.
If you want to paint your own calipers, take them off the car first, as he does, rather than spraying them in place. Clean off the grime and brake dust, use paint made for high heat, and let it cure fully before you bolt everything back on. Keep paint off the rotor surface and the pads, because anything on the friction surfaces is a safety problem.
When you replace plastic parts under the hood, such as an overflow tank, make sure the replacement matches the original and that the cap and hoses seal properly. The cooling system runs under pressure, and a small leak can turn into an overheated engine.
Think about the order of jobs too. As he points out, taking the tank out opened up access to the motor mount. Plan your project so that one teardown lets you handle several repairs at once, and you will save yourself a lot of extra labor.
Finally, keep the little details if you can. A warning sticker, a factory clip or an original label costs nothing, and it tells everyone who opens the hood that the car was treated with care.
That is really what this build is about. At 39, he is not chasing a trophy. He is finishing the car his 18-year-old self pictured, one red caliper and one super-glued sticker at a time.