

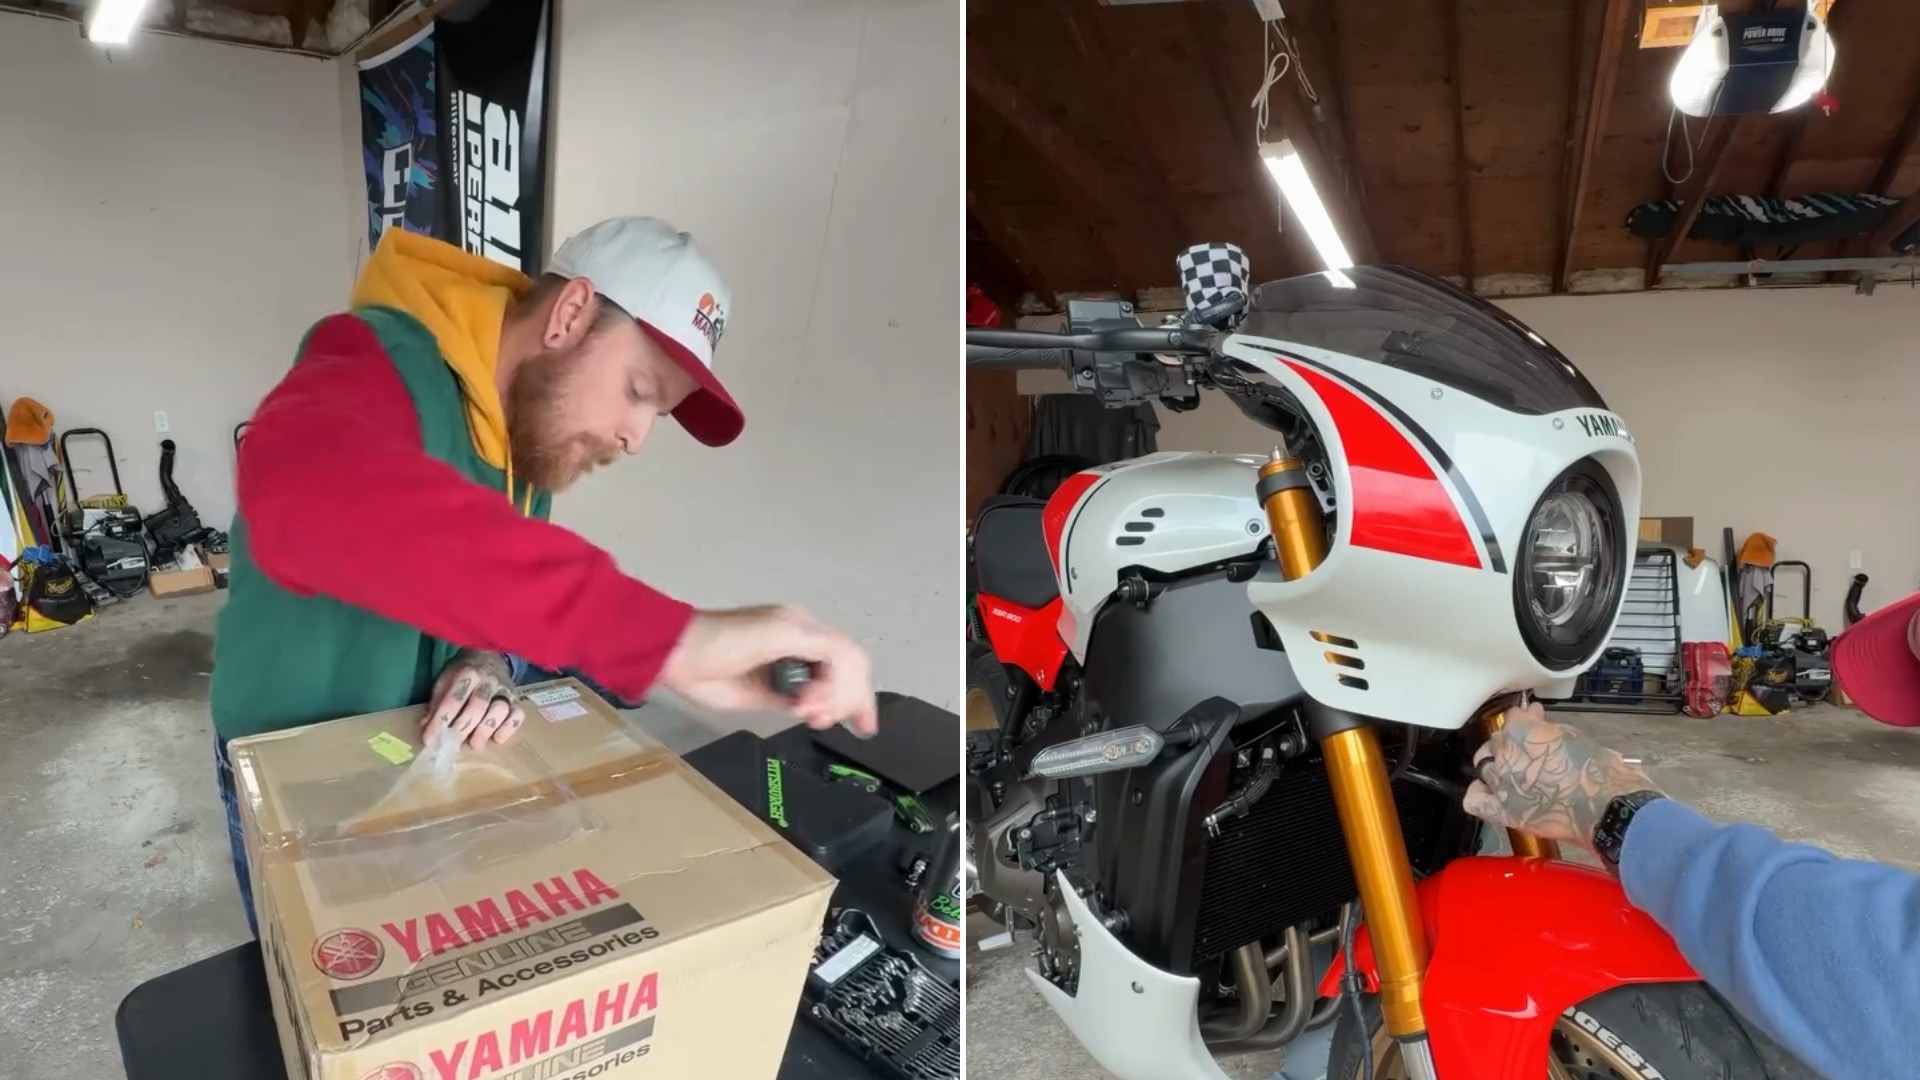
The video starts with cardboard. Yamaha boxes are stacked on a table in a garage, each one printed with the red Yamaha Parts & Accessories logo, and a rider in a color blocked hoodie and a trucker cap is already running a blade through the tape on the top one. What is inside came a long way. “Transforming my Yamaha XSR900 with OEM parts from Japan!” he writes in the caption, and over the next two and a half minutes the bike gets a different face and a different belly.
The reel comes from @dakotastonee, and the job list is short and specific. “Today we’re installing the XSR900 GP Belly pan which requires a bit of modification to make work, but otherwise bolts right up,” he writes. “Also, we have the beautiful front headlight cowl that’s paint matched.” The bike waiting for those parts is a white XSR900 with red blocks on the tank, gold fork tubes, gold wheels and a red front fender.
View this post on Instagram
The belly pan goes first, and the brackets come out of the boxes before any bodywork does. The camera sits close on a pair of hands holding a black metal bracket while a rubber grommet is pressed into it. Then the shot drops low, to the bottom of the engine, where a long bolt is threaded in by hand just under the case covers. He crouches beside the bike on the concrete, working at the lower frame behind the front wheel with hardware in his fingers.
Then comes a shot nobody expects in a parts install. A tube of Colgate Max Fresh is held up against a mounting point low on the bike, with a dab of white paste squeezed out at the tip. The caption’s one caveat is that the belly pan “requires a bit of modification to make work,” and this is the stretch of the video where toothpaste, a black lower panel and a workbench all get involved. The black panel is held up to the camera in the garage with the bike parked behind it. The white belly pan itself is laid out on a bench over a dark cloth, and the rider bends over it, working on the inside face.
When it goes on, it takes two people. He lies on his side on the garage floor and reaches under the engine to line the pan up, while a second man crouches on the far side of the bike. A few seconds later the white pan is sitting under the motor and he is still on the floor, working along its lower edge near the front wheel.
The headlight cowl is the second half. The stock round headlight is unbolted and lifted away, held in two hands in front of the bike. New brackets go up at the forks: perforated silver side plates held against the gold tubes, then a black bracket in a tattooed hand at the same spot. The cowl gets its own time on the bench too, face down on the cloth while he works inside it.
The last shots are the payoff. The cowl is on, white with red blocks running across each side and YAMAHA in black letters on one flank, wrapped around a round headlight with a dark screen above it. From the side, the cowl, the tank and the belly pan now carry the same white and red from the nose to the underside of the engine. “Both of these mods completely change how this bike looks and I’m SO happy with the results,” he writes, before thanking a friend “for the help!”
For anyone looking at the same parts, the most useful line in the whole post is the honest one. A genuine Yamaha part is not automatically a bolt on part when it was made for a different model. He says plainly that the GP belly pan needs modification on his XSR900, so the first step before ordering is finding out exactly what has to be changed, and deciding whether you are comfortable altering a painted factory panel that had to be shipped from overseas.
The order of work in the video is worth copying. Brackets and hardware go on the bike first, the painted panels last. Leaving every bracket bolt a little loose until the panel is hanging in place gives you room to even out the gaps before anything is tightened for good.
Both painted parts spend their bench time on a soft cloth, and the cowl sits face down on it. That costs nothing and it protects the one thing that is hardest to replace on a paint matched part. A folded blanket or an old towel on the bench does the same job.
The toothpaste deserves a note of its own. A dab of paste on a mounting point is an old garage way to transfer a mark onto a panel during a test fit, because it shows exactly where the mount touches and it wipes off clean afterward. It is cheaper than guessing with a drill.
A belly pan is long, low and awkward, and the video shows why a helper matters. One person holds the panel in position while the other starts the bolts, and nobody has to balance fresh paint on a knee. If you are working alone, a jack with a padded block under the pan can stand in for the second set of hands.
The stock headlight comes off in one piece here, and it is worth keeping that way. Bag the original bolts and brackets, label them, and store them with the light so the bike can go back to standard later.
Finally, check the things the new parts sit close to before the first ride. Turn the bars from lock to lock to make sure nothing touches the cowl or pulls on the headlight wiring. Look at how close the belly pan sits to the exhaust, and confirm you can still reach the oil drain plug and filter, or know which bolts come out at the next oil change.